Splio Loyalty Magento 2
1.Installation guide
1.1.Extension installation
Before the extension install, it must be ensured that the Magento environment is properly configured.
Please feel free to check among other topics:
- the cron tasks configuration, required for the proper functioning of the extension.
- the user rights configuration, required for the proper installation of the extension.
1.1.1.Through composer
You can follow the procedure written here: https://experienceleague.adobe.com/docs/commerce-operations/installation-guide/tutorials/extensions.html?lang=en
- Place an order for the extension through the Magento marketplace.
- Make sure that the repo.magento.com repository exists in your composer.json file:
"repositories": [ { "type": "composer", "url": "https://repo.magento.com/" } ] - Update your Magento composer.json with the following lines in require and repositories sections:
"require": { "home-made-io/splio-sync-m2": "^1.9.4" "home-made-io/splio-loyalty": "^1.0.0" } - Enter your authentication keys. Your public key is your username; your private key is your password.
- Wait for Composer to finish updating your project dependencies and make sure that there aren’t any errors:
Updating dependencies (including require-dev) Package operations: 2 install, 0 updates, 0 removals - Installing home-made-io/splio-sync-m2 (1.9.4): Downloading (100%) - Installing home-made-io/splio-loyalty (1.0.0): Downloading (100%) Writing lock file Generating autoload files - To verify that the extension installed properly, run the following command:
bin/magento module:status HMio_SplioSync HMio_SplioLoyalty - Enable the extension and clear static view files:
$ bin/magento module:enable HMio_SplioSync HMio_SplioLoyalty --clear-static-contentYou should see the following output:
The following modules have been enabled: - HMio_SplioSync - HMio_SplioLoyalty To make sure that the enabled modules are properly registered, run 'setup:upgrade'. Cache cleared successfully. Generated classes cleared successfully. Please run the 'setup:di:compile' command to generate classes. Generated static view files cleared successfully. - Register the extension:
$ bin/magento module:status HMio_SplioSync HMio_SplioLoyalty - Recompile your project: In Production mode, you may receive a message to “Please rerun Magento compile command”. The application does not prompt you to run the compile command in Developer mode.
$ bin/magento setup:di:compile - Verify that the extension is enabled:
$ bin/magento module:status HMio_SplioSync HMio_SplioLoyaltyYou should see output verifying that the extension is no longer disabled:
Module is enabled - Clean the cache:
$ bin/magento cache:clean - Disable maintenance mode:
$ bin/magento maintenance:disable
1.1.2.Through the Magento admin panel
- Place an order for the extension through the Magento marketplace.
- Go in Magento admin, menu System > Tools > Web Setup Wizard.
- Click the Extension Manager icon.
- Within the Magento Marketplace Account section, click on New Purchases, and follow the instructions to install the extension.
The extension installation must be relatively quick (under 5 minutes). If this delay is exceeded, please check the log files.
1.2.Extension uninstallation
Open a terminal and run the following commands in your Magento directory:
$ composer remove home-made-io/splio-loyalty
$ bin/magento setup:upgrade
$ bin/magento setup:di:compile
$ bin/magento setup:static-content:deploy
$ bin/magento cache:clean2.User guide
2.1.Overall functioning
The Splio Loyalty extension for Magento 2 allows to integrate the Loyalty Web Kit configuration within your Magento 2 / Adobe Commerce websites
2.2.Extension configuration
The extension needs you to define the code of the Splio universe in which there is the Loyalty Web Kit configuration you want to display.
The Splio universe code is the third parameter to fill in the connection login in Splio admin:
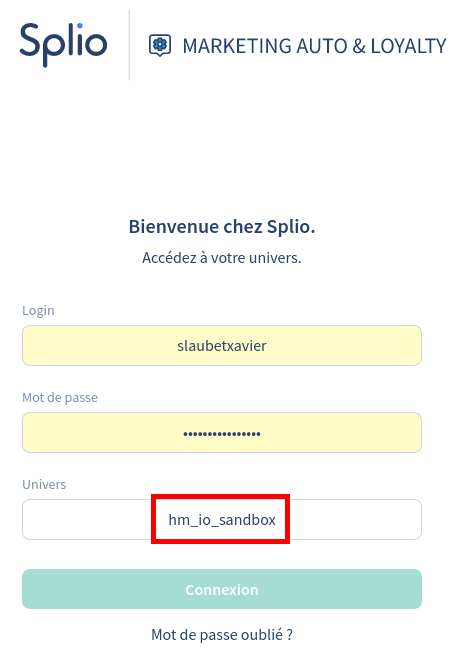
Warning: The Splio universe code filled must be the code of the universe in which you have defined your API key.
2.2.1.Configuration access settings
Now, go the the section Splio Sync > Loyalty in the configuration.
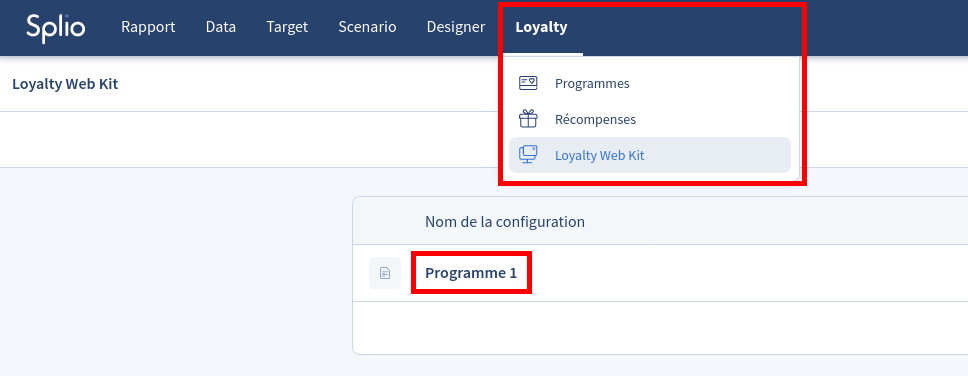
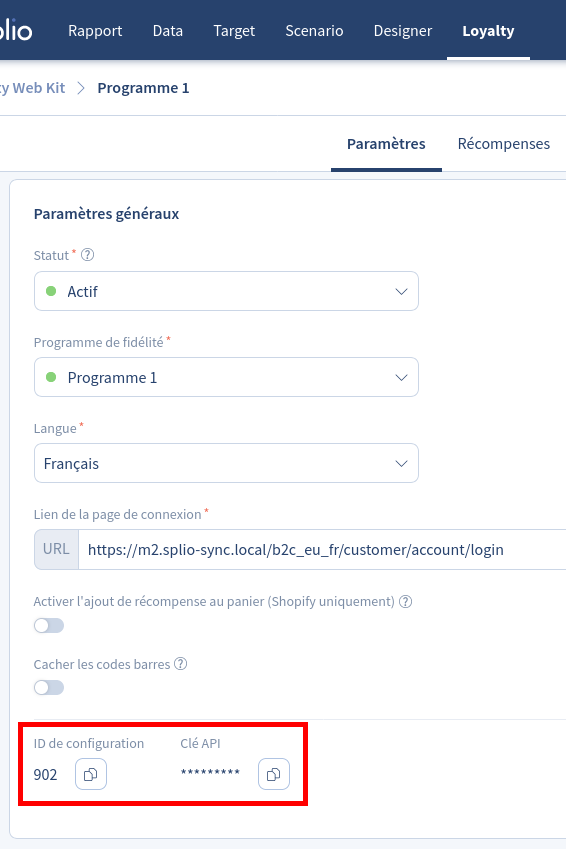
You can define here the ID and the API key of the Loyalty Web Kit configuration you want to use. To find them, go to Splio interface, menu Loyalty > Loyalty Web Kit, select the configuration you want to display, and copy the ID and the API key displayed in « General settings » fieldset.
2.2.2.Display settings
You can now decide which way is displayed the Loyalty page in your stores.
The extension allows 3 display modes :
- on a specific tab in the customer account: you can choose the label to use. Feel free to translate it for each of your stores
- in a dedicated page to add in your footer for example: you can define the URL and the title of the page
- as a badge: at the bottom left or bottom right of every page of your stores, except the two pages listed just above
2.3.Advanced use cases
2.3.1.Custom font
The Splio Loyalty Web Kit allows you to choose a font in the Google Fonts pool to use for your loyalty program page.
But you may use your own font already on your website, and you want to use it also in the loyalty program page. To do so, add the following CSS rule in your CSS file:
.splio-display { font-family: 'Faune','Helvetica Neue',Helvetica,Arial,sans-serif; }